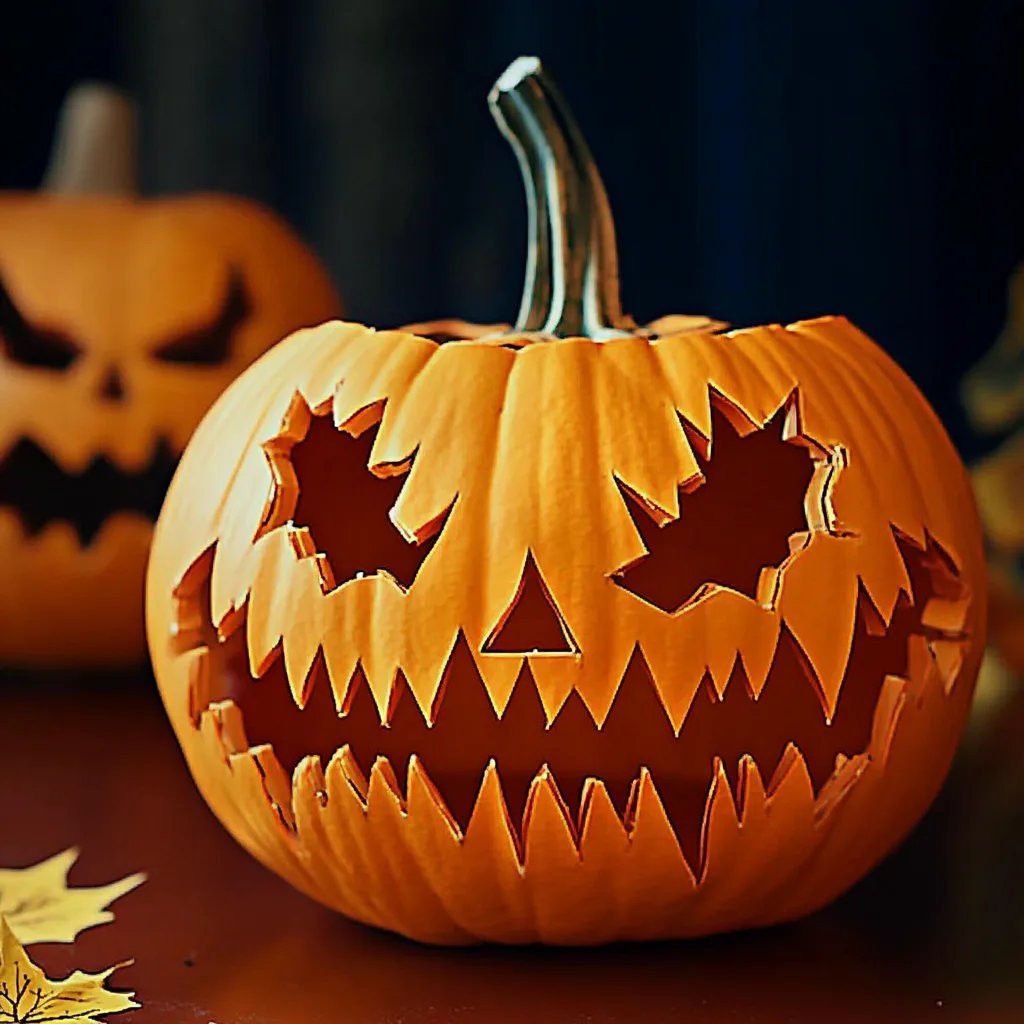
Pumpkin Face Craft: An Incredible Ultimate Guide to 10 Fun Designs
Pumpkin Face Craft is an amazing way to celebrate the autumn season and Halloween. This creative outlet allows you to express your artistic side while engaging with family and friends. Whether you’re a seasoned crafter or a novice, making pumpkin face crafts can be a delightful experience. The best part? You don’t need to be a professional artist—just a bit of imagination and some basic supplies can lead to fantastic creations!
In recent years, crafting has become more popular than ever. People are looking for ways to unwind, and pumpkin face crafts serve as a perfect hobby. Imagine transforming an ordinary pumpkin into a whimsical creation that reflects your personality or style! With so many variations and ideas available, you're sure to find something that excites you.
As the weather cools and leaves begin to change color, it’s the perfect time to gather your crafting supplies and jump into the festive spirit. In this guide, we will cover the essentials of pumpkin face crafting, from preparation to final touches. You’ll learn why this craft is so enjoyable, the necessary supplies, and even some creative ideas.
Why You’ll Love This Craft
Pumpkin face craft is not just a fun activity; it's also a wonderful way to bond with loved ones. Here are some compelling reasons to dive into this creative project:
- Easy to Customize: Whether you want a silly grin or a spooky face, you can design your pumpkin however you like.
- Great for All Ages: This craft is suitable for children and adults alike. Everyone can contribute their ideas and artistry.
- No Special Skills Required: You don’t need advanced crafting skills to make beautiful pumpkin faces. Just grab your tools and start creating!
- Encourages Imagination: From traditional jack-o'-lanterns to imaginative creatures, each pumpkin face reflects the creator's personality.
- Eco-Friendly Fun: Using real pumpkins allows you to incorporate a natural element into your décor, and at the end of the season, you can compost them!
- Perfect for Celebrations: Pumpkin face crafts are an excellent addition to Halloween parties or fall festivals, helping to set a festive atmosphere.
- Budget-Friendly: Most materials are inexpensive or can be found at home, making it a great low-cost activity.
- Great Photo Opportunity: Your finished pumpkins will make for wonderful photos, capturing memories with friends and family.
With these enticing benefits in mind, it's easy to see why pumpkin face crafts have become a go-to activity for fall celebrations!
Preparation Time and Crafting Duration
Before diving into this fun craft, it’s essential to understand the time commitment involved. Here’s a breakdown of the preparation and crafting time required for pumpkin face crafts:
- Preparation Time: 15-30 minutes (gathering materials, brainstorming design ideas)
- Crafting Time: 1-2 hours (depending on the complexity of the design and the number of pumpkins)
Depending on your experience level and how elaborate your design is, the total time may vary. However, the joy of crafting is always worth the investment of your time!
Ingredients and Supplies Needed
Here's a list of supplies you'll need for your Pumpkin Face Craft:
- Fresh pumpkins (various sizes)
- Permanent markers or Sharpies
- Craft knife or pumpkin carving kits
- Spoon or scoop for removing seeds
- Candles or LED lights (for illumination)
- Paints (acrylic or spray paint)
- Tissue paper, glue, or festive decorations (for additional creativity)
- Optional embellishments (glitter, stickers, googly eyes, etc.)
These simple ingredients are all you need to get started on your crafting journey!
Step-by-Step Instructions for Pumpkin Face Craft
Creating your pumpkin face craft is fun and straightforward. Follow these steps to bring your creative vision to life:
- Select Your Pumpkin: Choose a fresh pumpkin that is the right size for your craft. A smooth surface is ideal for drawing or painting.
- Wash the Pumpkin: Rinse the pumpkin under cool water to remove any dirt and allow it to dry completely.
- Design Your Face: Use a permanent marker or pencil to sketch a face design on your pumpkin. This step helps in visualizing your final product.
- Carve or Cut the Design:
- For carving, use a sharp craft knife or pumpkin carving tool to cut out the facial features.
- If you prefer a painted design, skip the cutting and move to the next step.
- Scoop Out the Insides: If carving, use a spoon to remove the seeds and stringy pulp from inside the pumpkin.
- Enhance Your Design:
- For painted designs, apply acrylic paint using brushes. Let the paint dry between coats for a vibrant finish.
- For additional features (like glitter or tissue paper), use craft glue to apply these once your base design is complete.
- Add Lighting: Place a candle or LED light inside the pumpkin for a glowing effect. Make sure to secure it safely.
- Display Your Creation: Choose a spot to showcase your pumpkin face craft! Consider using it as part of your décor at home or outside to welcome guests.
- Document the Process: Take photos of your crafting journey to share with friends or family.
- Celebrate Your Art: Gather around your created pumpkin at night and admire your handiwork illuminated by flickering candlelight.
By following these simple steps, you'll be able to create a standout pumpkin face craft that brings joy to your autumn celebrations!
How to Serve
To make the most of your pumpkin face craft, consider the following ideas for displaying and enjoying them during the fall season:
- Create a Pumpkin Display: Arrange your pumpkins on a porch, table, or windowsill to create a themed display. Mix heights and sizes for visual interest.
- Incorporate Into a Centerpiece: Use smaller pumpkins as part of a dining table centerpiece, surrounded by gourds or autumn foliage.
- Host a Pumpkin Contest: Invite friends or family to create their own pumpkin facades and host a fun judging party with small prizes.
- Lighting Enhancements: Use colored lights or string lights around your display to enhance the spooky or autumnal vibe.
- Seasonal Themes: Change your pumpkins as the season progresses, moving from traditional Halloween themes to Thanksgiving and autumnal designs.
- Safety First: Ensure that any live candles are safely placed and monitored. LED lights are an excellent alternative for safe illumination.
By thinking creatively about how to showcase your pumpkin face crafts, you'll amplify the joy and festivity of the season, leaving a lasting impression on your guests and loved ones!
With these tips and guidance, you are now ready to embark on your pumpkin face crafting adventure. Happy crafting!
Additional Tips
- Embrace Creativity: Don't be afraid to try out new designs and themes. Your pumpkin can resemble anything from a classic jack-o'-lantern to pop culture icons.
- Use Stencils: If drawing is not your strong suit, consider utilizing stencils. Many templates are available online that can help guide your design.
- Secure Your Supplies: Make sure you have all your materials ready before starting. This will prevent interruptions and aid in a smoother crafting experience.
- Involve Everyone: Encourage family members to participate in the crafting process. This shared experience will create lasting memories.
- Explore Texture: Try incorporating various materials like fabric or textured paint to add dimension to your pumpkin face crafts.
- Time Management: If you have multiple pumpkins to decorate, consider setting a timer for each stage to keep your crafting session organized.
Recipe Variation
Feel free to explore variations in your pumpkin face crafts! Here are some creative ideas:
- Glowing Faces: Use glow-in-the-dark paint to create faces that sparkle at night.
- Mixed Media: Combine painting with collage by adding fabric, paper, or natural elements like leaves for a unique texture.
- Light-up Pumpkins: Instead of using traditional candles, try string lights to create an illuminated effect that can cheerfully brighten any space.
- Seasonal Themes: Change the theme of your pumpkin faces as holidays approach, integrating Christmas or Thanksgiving motifs as the seasons change.
Freezing and Storage
While pumpkin face crafts are typically decorations rather than edible items, there are tips to ensure your pumpkins remain fresh longer:
- Store Indoors: Keep your pumpkins in a cool, dry place to prevent rotting. Direct sunlight can cause them to deteriorate faster.
- Hollowed Pumpkin Care: If you carved or hollowed your pumpkin, consider applying petroleum jelly to the cut areas to seal in moisture and extend its life.
- Display Rotation: If you're using multiple pumpkins for decoration, rotate their display location regularly to allow for even exposure to light and air.
Special Equipment
The following tools will help streamline your pumpkin face crafting process:
- Carving Kits: Specialty pumpkin carving kits often include various tools specifically designed for intricate designs.
- Paintbrushes: Various sizes allow for detailed painting and layering.
- Scoop: A sturdy spoon or pumpkin scoop is essential for hollowing out pumpkins effectively.
- Blower: For drying painted designs quickly, a small handheld blower can be handy.
- Light Sources: Candles or LED lights to illuminate your crafted pumpkins from within.
Frequently Asked Questions
How do I prepare the pumpkin for crafting?
Start by thoroughly washing the pumpkin with soap and water, then let it dry. This will remove dirt and make it easier to draw or paint.
What tools can I use if I don’t have a carving kit?
You can use a craft knife, cookie cutters for shapes, or even kitchen utensils like paring knives for smaller details.
Can I keep my pumpkin face crafts for a longer time?
Yes, with proper care and storage, your pumpkins can last several weeks. Just be sure to keep them in cool conditions.
What should I do with my pumpkin after the crafting season?
After the seasonal festivities, you can compost your pumpkin, or if painted, repurpose it by using it as a decorative planter or garden ornament.
Are there non-edible alternatives to pumpkins for crafting?
Absolutely! You can use foam pumpkins or even gourds, which can also hold up well for crafting while providing a unique look.
Conclusion
Pumpkin face crafts offer a delightful way to celebrate the autumn season. It's a fun and engaging activity for everyone, encouraging creativity and providing a festive atmosphere. Whether you stick to traditional designs or experiment with contemporary themes, the possibilities are endless. By incorporating your personal touch, these crafty creations reflect your unique style and bring joy to your décor.
So gather your supplies, invite your loved ones, and start crafting your pumpkin faces this fall! You'll surely create cherished memories, and your Halloween celebration will flourish brighter than ever.